Feeds:
Posts
Comments

Unbridled joy

In hindsight, I was too optimistic. Or at least, I should’ve known better. I mean, I had two hours. Two full hours to get to a pasta-making class. But I also know how DC rush-hour traffic works, so I should’ve known better. Still, I run an errand, went home to change. There was time. And of course, when I got into the car2go and told my Google maps where to go… the 20 minutes had become 45. Parking by the metro didn’t work, as the in-car computer refused to let me park there. “You are outside of the car2go home area” it kept saying to me. I was squarely in the middle of DC but no… No parking for me.

So I started to cry. Yes. Fulfilling every girly stereotype, I cried. I cry when I am frustrated or angry. And I was both. Angry for being late to a class I had been wanting to take for a long time. Frustrated because I knew the class was non-refundable and that after 15 minutes they wouldn’t let me in. Plus, I had had two very tiring, difficult days and I was looking forward to cooking and having some me-time. I did not want to miss that. Since I couldn’t take the metro, I kept in driving, and, in what felt close to Borges’ story of the “Secret Miracle”, in which time passes differently for the main character than for the rest of the people, my 40 minutes became 30 and I made it. Barely, but I made it.

And then the magic started.

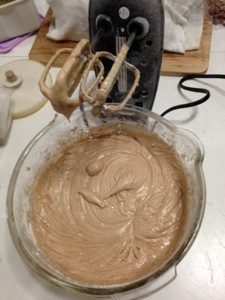
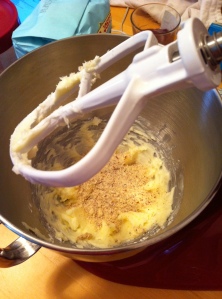
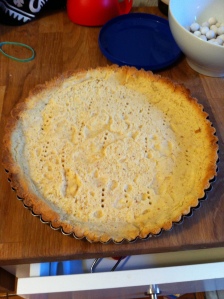
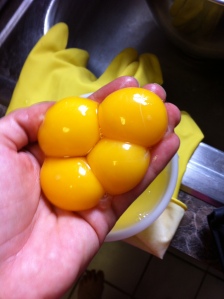
I was given 1.5 cups of flour, some salt, a fork, and two eggs. I was told to make a round crater in the  middle of the flour, add the two eggs, scramble them, and then slowly flip into them flour while mixing well. It had to be done quick enough that we didn’t mix our batter too much, or it would harden, slow enough that the egg wouldn’t run out the side. Then it was time to knead. And add more flour. The pastry baker in me hated adding so much flour. It went against all the years of hearing mom say my dough would be too dry for the pies and cookies.  Yet the teacher kept reminding me I needed to have a harder, drier dough. It was pasta, after all. That was my first lesson of the day. Pasta dough needs to be drier.

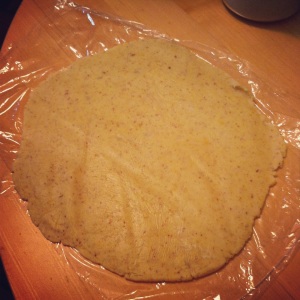
After a few minutes of adding more flour, it was ready. Time to let it rest.  Second lesson of the day. I thought you needed to let leavened dough rest so as to let it rise. And while that is true, the other reason for resting is that while kneading, you toughen the dough (the more you knead the more gluten releases and your dough gets a little harder). When you let the dough rest, you allow for the molecules to break apart and the dough softens. That’s why even unleavened dough needs to rest. So that’s what my dough did, under a comfy kitchen towel.

After about fifteen minutes, it was time to knead it on the machine, folding and dusting with flour, for a good 10 passes through the lowest setting, until it was smooth and no longer clumpy.

Then, another pass, once per setting, going higher, until about 5. By this time, it was a long strip, so we were encouraged to cut it in three pieces before moving on.

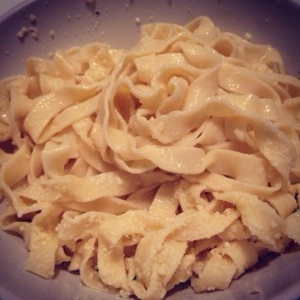
So we did, and then hid the pieces under the cloth while the teacher demonstrated how to pass the pasta through the slicer. She made it thinner by going to higher machine settings and when ready, she put her dough through the slicers, cranked the lever and out the other side came the fetuccini. Like a 5-year old, I squealed of joy. I don’t know if the rest of the class heard me, and I frankly don’t care. That magical moment of cooking had happened. We had taken four or five ingredients, we had put elbow grease to them and had ended up with something completely different, delicious and fulfilling.

I cranked my own dough through the machine when it was my turn, sliced it and dried it in cornmeal as we were instructed. Then I went home and cooked it, dressing it only with some garlic salt, butter and parmesan. It was so soft and creamy I don’t know how I’ll go back to bagged pasta.

20140516-153923.jpg

The thing I struggle with the most in days like yesterday is remembering to be kind and patient with myself.  I had no control over the traffic, and getting stressed would have no effect on how quick I would make it to my destination.  The good thing is that while the stress I experienced all the way to class was of my own making, the minute I walked into that kitchen I began to relax. Cooking is my zen, my peace bubble; that “happy place” therapists tell you to go to. And baking or working with dough is the epitome of that happy place to me. The minute my hands touched the flour and got sticky, the minute I started to knead and felt the texture of the dough against my fingers, all the problems of the day were forgotten. When the pasta came out in strands and I squealed, it was pure, unbridled joy. That’s how much I like cooking, how powerful I find it. Cooking is my therapy, my happiness, the place where I think , forget, meditate, come together. The place where, for however many minutes it lasts, I am my truest and most fulfilled self. What is yours?

Ayocotes are big, flat-ish beans (I’ve sometimes called them beans on steroids) that were popular in pre-Hispanic México and during the colonial time, but somehow got out of fashion. You can still find them, though, and luckily for those in the US, Rancho Gordo sells quite a variety of them. To make the ones here, I combined their instructions on the bag, Sara Kate Gillingham‘s idea of adding beer (that I got off an Instagram of hers) and my aunt’s recipe in Puebla, México. Here I’m using the same ones my aunt used for the recipe she gave me, scarlet runner beans.

Ingredients

  • 1/2 lb Scarlet Runner Beans
  • 1/2 head of garlic, each clove peeled, left whole
  • 1 box of baby portobello mushrooms, sliced
  • 10-15 cilantro sprigs
  • 1 pasilla chile
  • 1tbsp dried epazote
  • 2 bottles Red Stripe beer
  • 10 c water

Prep

At least 6 hours before (or better yet, the night before) soak the beans in cold water. I recommend checking them for stones or little pieces of dirt that sometimes get into the bags of beans. As a child it was my favorite part of helping my dad cook beans: the game of find the pebble in the bag. But I digress.

In a large pot, add the soaked beans, including the soaking water (you’re throwing out flavor otherwise) and add the 10 cups of water. Turn stove to high heat and, when the water is warm but not boiling, add the garlic, cilantro, pasilla, mushrooms, epazote and beer. Bring to a boil. The liquid will foam. Remove it with a spoon (beans are famous for causing gas. According to my aunt, removing this foam is what makes the beans less gass-y).

Lower the heat to low and cook, covered, for about 2 hours or until  the beans are soft. I like my beans on the less-saucy side, so I discarded a lot of the liquid after they were cooked (normally I would save it for a tortilla soup, but not this week). Once you have the desired quantity of liquid, season with salt and pepper to taste.

These beans work wonderfully as a side-dish or added to a quinoa salad. If you try them, let me know what you think!

photo 1 (2)

Cinnamon muffins

I posted about this on my Instagram over the Holidays. It was a recipe I modified while baking with my favorite aunt in México. It’s about three weeks late in posting, but here goes.

Yield: About 18-20 muffins

Ingredients:

  • 1/2 c unsalted butter
  • 3/4 teaspoons ground cinnamon
  • 3/4 c sugar
  • 2 c flour
  • 3 to 4 tsp baking powder
  • 1/2 tsp baking soda
  • 1/4 salt
  • 1 tsp vanilla extract
  • 2 eggs
  • 1/2 c milk
  • about 2 tbsp powdered sugar, for topping.

Prep

  • Butter and flour muffin pan (I used a 12-muffin one)
  • Mix flour, baking powder, baking soda, salt and cinnamon in a bowl. Set aside
  • In a large bowl (or in the electric mixed one, if you have it), beat the butter and sugar until light and fluffy, about 4 minutes.
  • Add vanilla
  • Add eggs one at a time, making sure to beat well in between each addition
  • Lower speed and alternate adding the dry ingredients and the milk
  • Batter should feel heavy. If too dry, add a little more milk.

20140120-201520.jpg

  • Pour about two tablespoons of dough per muffin space.

20140120-201538.jpg

  • Bake for about 20 minutes or until muffins are golden brown.
  • Remove from oven and let cool  a bit. Remove them from pan carefully, while still hot, otherwise they will stick to the pan.
  • When fully cooled, top with powdered sugar.

20140120-201547.jpg

It’s been months since I’ve posted here. Studying for grad school qualifiers will do that to you. I made myself focus on the books and not cook as much, so therefore there was hardly anything to post. But now the test is over and I am back in the kitchen and loving it.

This recipe begins as many do: With a bunch of things left over in the fridge and the need to make something with them. That, and a strange craving for soup (don’t get me wrong, I love soups, but I’ve never been the biggest fan of them).

Ingredients

  • 8 cups chopped collard greens, stems removed (I got this from about 1 large bunch)
  • 3tbsp olive oil
  • 4 oz baby spinach
  • 1/2 onion, chopped
  • 2 garlic cloves, chopped
  • 1 c hot water
  • generous sprinkling of dried oregano
  • 1 can cooked chickpeas, drained
  • 2 c vegetable or chicken broth
  • 7 oz (1/2 can) coconut milk
  • 1/2 c ground cashew nuts, unsalted
  • salt and pepper to taste
  • juice of 1/2 a lime (about two tbsp)

Prep

  • Cook the chard in a large pot of water until just wilted. Drain.
  • In the same pot, heat the olive oil. When glistening, add the onions and garlic, reduce heat slightly and cook until translucent.
  • Add spinach and the cup of hot water.
  • When the spinach has wilted, add the cooked collard greens, oregano, chick peas and the two cups broth of your choice.
  • Season with salt and pepper, bring to a soft boil and let the flavors mix, about five minutes.
  • Remove from heat and let cool slightly. With an immersion blender, blend until you have a smooth and uniform soup.
  • Return to the stove, add coconut milk and pureed cashews and bring to a soft boil, reducing thickness of soup until desired consistency (I like my soups on the creamy side, so I reduce them quite a lot).
  • Add the lime juice, taste and adjust salt and pepper if needed.

photo (5)

Soup freezes well; picture doesn’t do justice to the flavor punch that this experiment turned out to be.


Your guide to pies

The wonderful ladies at The Kitchn have written a guide on how to bake home-made pies. 🙂 Love it. It says a lot of what I have always felt: It’s about the flavor, not about the looks. If you are like my mom, whose artistic abilities and patience allow her to replicate the picture or even make it better, I am in awe of you. But the rest of us fret about the look of our baked goods. It also talks about crusts and all the steps for the pie. Joy.

Go and check it out! 🙂

Last week, while watching PBS on my iPad, I saw a small video of Aube Giroux’s Strawberry Basil Tart. I fell in love with the film, the music, the recipe and the aesthetic of the dish. As I always say, food IS art, and she proves it.  This little thing has managed to jump over several desserts I have in my favorite rotation and jumped to the top 5. Will surely be making it for my next get-togethers.

While her video is impossible to replicate or top, I am being courageous here and posting the photos of my preparing it at home and the end result (I forgot to take a picture of the syrup and of the yolks before adding them to the milk). I actually had to make-do with only one cup of basil, but it still came out delicious!

Creamed butter with ground almonds

Masa a medias

I actually did a little dance of joy when this was done. Such great texture and so easy to roll!

Masa fuslereada

Freshly out of the oven

Masa horneada

Basil and strawberries waiting

Albahaca y fresas

Preparing the custard…

Basil and milk

Finger-straining the yolks after one fell into the whites…

Colando yemas

The finished product! So pretty, I don’t want to touch it.

Pie listo

Now go, get the ingredients and make it. It’s soooo good!

This weekend I shopped, but for baking stuff, so when it came to cooking today’s lunch I had to go with the three things I had on hand (you will see the Campari tomatoes from last week). I could’ve done an episode of 5 ingredient fix… It turned out to be soo yummy and creamy I am in love with it and am taking some for lunch tomorrow.

FISH À LA “WHATEVER-IS-IN-THE-FRIDGE”

Serves 2

Ingredients

  • 2 tilapia loins, cut in cubes
  • 1/4 onion, chopped
  • 4 Campari tomatoes, quartered
  • 2 teaspoons dried parsley
  • 1 teaspoon garlic powder
  • 2 tbsp olive oil
  • 1/4 c white wine (I used Chardonnay)

Prep:

Heat one tablespoon oil in a medium temperature and fry the onion. Add the tomatoes and cook until the tomatoes soften a little. Add the parsley and garlic. Mix well. Remove from heat and pour into bowl. Return the pan to the flame, add second tablespoon oil and when hot, add the tilapia cubes. With a pair of tongs, turn tilapia so that all sides are white and seared. Return tomato mix to pan. Add salt and pepper to taste. The mix will look creamy. Add the wine and let it reduce until the creamy texture returns.

Pescado c:jitomate y cebolla

(apologies for the less-than-stellar picture, I forgot to take a picture of the plated version before eating it :D) It may not be the best-looking thing, but trust me, it was good.

Notes

Because tilapia is such a delicate fish, it will cook quickly. As you see from my picture, several of my cubes broke apart, so be careful if presentation matters.

The middle of the summer is always the time in which I least want to cook. Not because I don’t want to, necessarily (though when I’m really tired I don’t), but because it’s too hot to cook! So I end up craving salads and other cold meals.

This is an adaptation of a recipe I found in the Epicurious website. As usual, I’ve adapted it to make-do with what I had at home. I used tri-color quinoa, but any color will do.

(WARM) KALE AND QUINOA SALAD

Serves about 3 as a main dish

Ingredients:

  • 1 c quinoa, rinsed thoroughly
  • 2c water
  • 1/2 onion, minced
  • 1/4 c pistachios, shelled
  • 6 or 7 Campari tomatoes, washed and quartered
  • 1 teaspoon mustard
  • 1/4 c white balsamic vinegar
  • 4 tbsp olive oil, divided
  • 1 head of kale (about 4 cups), washed, stemmed and chopped

Prep

Add two tbsp olive oil to a large pot or casserole over medium heat. Add the onions and sauté until they become translucent. Add the quinoa and stir a bit to mix it in. Add the kale and the water.

Quinoa Kale raw

Bring to a boil, reduce the heat to medium, cover and cook for about 15 minutes, or until water is absorbed and the quinoa has gotten fluffy. Remove from heat and toss to start cooling it.

Quinoa kale cooked

Meanwhile, mix the mustard, vinegar and remaining tablespoons of olive oil to make vinaigrette. Mix until emulsified.

Once the quinoa-kale mix has cooled, add it to the pistachios and quartered tomatoes.

Tomatoes and pistachios

Drizzle the dressing on top, add salt and pepper to taste and mix.

Quinoa kale mixed

Notes

I find that refrigerating the salad overnight enhances the flavors. You can heat it up a bit (hence the “warm” in parentheses) or you can eat it chilled.

I got distracted and neglected the onions a bit, so some of them caramelized. I think it works to the advantage of the dish.

P1000671

This morning a friend invited me and another friend for dinner. She said to bring dessert or an appetizer. I chose dessert. It was so cold outside that I decided to bake with whatever I had on hand because I was not going out. I remembered I had frozen strawberries and decided that a chocolate-strawberry cake it would be. I found this recipe and modified it to accomodate what I had in the pantry. The result was one of the fluffiest, yummiest cakes I’ve ever baked.

CHOCOLATE-STRAWBERRY CAKE SQUARES

Ingredients:

  • 2/3 lb frozen strawberries, thawed (save 1/2 c juices)
  • 1 and 2/3 c sugar, divided in 1 c and 2/3 c
  • 1 cup boiling-hot water
  • 3/4 cup extra-dark unsweetened cocoa powder
  • 2 cups all-purpose flour
  • 1 1/4 teaspoon baking soda
  • 1/2 teaspoon salt
  • 2 sticks (1 c) butter, softened
  • 4 large eggs
  • Powdered (confectioner’s) sugar for garnish

Prep:

  • In a bowl, toss the thawed strawberries and the 1/2 c of their juice with 2/3 cup sugar. Set aside.
  • Preheat oven to 350 F. Mix the cocoa and hot water in a bowl and mix until chocolate is fully dissolved. Set aside.
  • Sift the flour and mix it with the salt and baking soda in another bowl. Set aside.
  • Either in the bowl of a standing mixer, or another big bowl, mix the butter and 1 c remaining cup of sugar at medium speed until well-blended and fluffy, which in my case was about 4 minutes. Add the eggs one at a time, mixing well after each addition. Alternate the flour, strawberries and chocolate mixtures, starting and ending with the flour  until they mix. Do not over-beat, but make sure ingredients are incorporated.
  • Butter a rectangular 9×13 pan and pour batter into it. Bake in the middle rack for 35 minutes.
  • Allow it to cool in the pan, slice into squares and dust with powdered sugar before serving.

P1000670

NOTES:

The original recipe said to bake for 35-40 minutes but mine came out exactly at 35. I used a glass pan and it worked very well. If you use a metallic one check your time as the baking time may change. It looked like this when it came out:

Strawberry chocolate cake squares

* Doña Mari’s Black Mole

Whenever someone asks me what my favorite Mexican dish is, I have a hard time giving an answer. I can, however, name my absolute favorite mole: the mole negro (black mole) de Oaxaca, a mole so complicated I’ve yet to make it. Sadly, the last few times I’ve had it, it has not been very popular with my stomach. Something about it just does not sit right with me. Because I have come to the sad realization that I may not be able to eat it again,  today’s post is not on how to make mole negro de Oaxaca (you can go here to find a recipe I trust), but about a little corner eatery in Mexico City where yesterday I ate the best mole negro I have had.

About 6 blocks off the General Anaya metro station in Mexico City (line 2, for ye curious) sits a small corner eatery called El rincón oaxaqueño (The Oaxacan corner). It sits 14 people max (three four-tops and a douce). Behind the counter, Doña Mari, the owner, her daughter and an assistant, serve all kids of Oaxacan delicacies. On one side, another lady makes quesadillas with freshly-made tortillas and Albino, the waiter, juggles the rest. The big titles in the menu are the tlayudas, the big, flat tortillas and their toppings, cecina (a salty thin steak) and, of course, mole negro.

Like any good fonda (food stand/boarding house) owner, Doña Mari treats her loyal customers like family. My cousin Lorena dines there frequently, so as soon as we sat down, Doña Mari came to greet us and to inquire who I was. Once it was established that I was the favorite cousin, forget it, I was in. Also in full care-taker mode, Doña Mari would not take “no” for an answer when told her I wasn’t planning on having soup before my main meal. How? Why don’t you want any? It’s lunch time! You should have a little! Of course I ended up saying yes. After my chicken and vegetables soup (which I accompanied with some of those freshly made tortillas) came my mole negro, in the form of enchiladas. Three tortillas, quickly dipped in oil, wrapping shredded chicken and topped with a sea of mole negro, cream and onion slivers. With a side of white rice.

I cannot begin to tell you what that mole was. A creamy consistency that came not from the heavy cream topping but from the layer upon layer of ingredients blended together. You could taste the smokiness and kick (without it being overbearing) of the roasted peppers, the hint of chocolate and the spices, the sweetness of the banana. Lorena, who had ordered a plate of chilaquiles, asked to have “a bit” of the mole. She ended up stealing much more.

Doña Mari checked on us twice, and we talked about kids (we were sitting with my niece) and about the difficulty of having a shop in this economy, of the hectic days and of the slow ones, such as yesterday, where the rain kept people away.

Places like Doña Mari’s are exactly the places where I love to eat most. Yes, fancy restaurants are great and molecular gastronomy has its beauty, but mom and pop restaurants, where someone is cooking like their grandma was cooking ages ago, and where the tortilla is made fresh in front of you, are my most beloved treasures. The mole negro de Oaxaca seems to not return my deep love, so I may not be able to eat it again (or perhaps not in a full-fledged dish). Yet, if this mole negro was the last one for me, I am happy that it was the best I’ve ever had and that it was in a place that was as humble and warm as a good home.